
Toilet flange replacement is a necessary skill for homeowners and DIY enthusiasts alike. This essential component ensures a secure connection between the toilet and the waste pipe, preventing leaks and maintaining proper sanitation. In this guide, we will explore the steps involved in replacing a toilet flange, including necessary tools, preparation, and installation techniques. Understanding these processes can save time and money while ensuring the job is done correctly.
Understanding the Toilet Flange
What is a Toilet Flange?
A toilet flange, also known as a closet flange, is a pipe fitting that secures the toilet to the floor and connects it to the drain pipe. It is typically made of PVC, cast iron, or stainless steel and is crucial for maintaining a stable and leak-proof connection.
Common Issues with Toilet Flanges
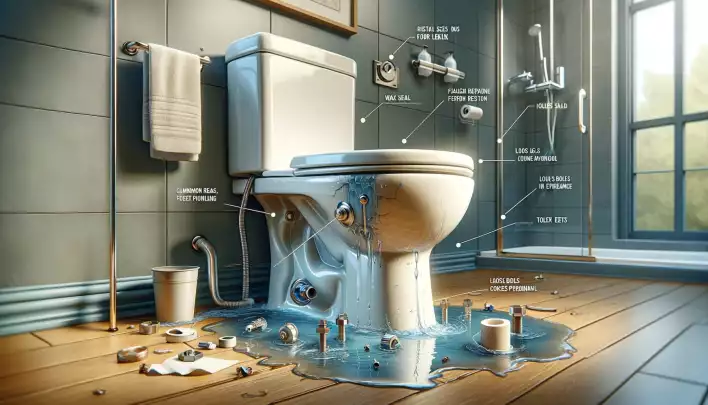
Over time, toilet flanges can wear out, crack, or become misaligned, leading to leaks and unstable toilets. Common signs of a faulty flange include water pooling around the base of the toilet, unpleasant odors, and the toilet rocking or wobbling. Prompt attention to these issues can prevent more severe plumbing problems.
Preparing for Toilet Flange Replacement
Tools and Materials Needed
Before starting the replacement process, gather the following tools and materials:
- Adjustable wrench
- Screwdriver
- Putty knife
- Wax ring
- Replacement toilet flange
- Hacksaw or reciprocating saw (if needed)
- Rubber gloves
- Safety glasses
- Rags or towels
Safety Precautions
Safety is paramount when performing any plumbing task. Always wear rubber gloves and safety glasses to protect yourself from sharp edges and potential contaminants. Additionally, ensure the water supply to the toilet is turned off before beginning the replacement process.
Steps to Replace a Toilet Flange
Step 1: Remove the Toilet
To access the flange, you must first remove the toilet. Begin by turning off the water supply and flushing the toilet to empty the tank and bowl. Use a sponge or towel to remove any remaining water. Disconnect the water supply line and unscrew the bolts securing the toilet to the floor. Carefully lift the toilet and place it on a protective surface.
Step 2: Remove the Old Flange
Next, use a screwdriver to remove any screws or bolts securing the old flange to the floor. Depending on the type of flange, you may need to use a hacksaw or reciprocating saw to cut through any adhesive or sealant. Once the old flange is removed, clean the area thoroughly to ensure a proper fit for the new flange.
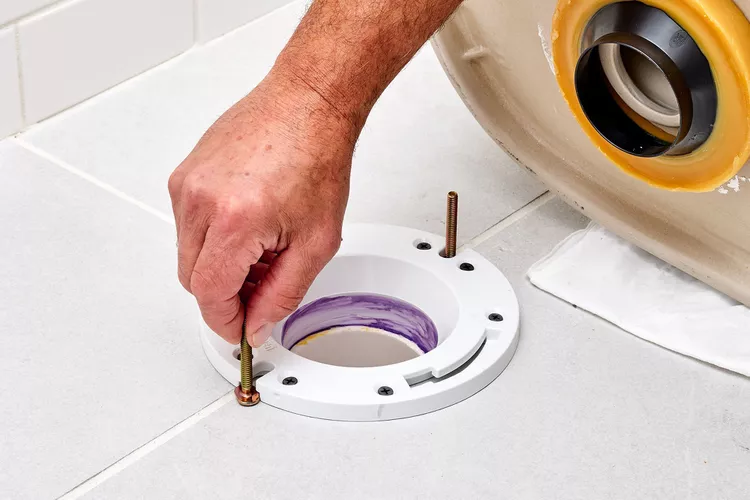
Step 3: Install the New Flange
Position the new flange over the drain pipe, ensuring it sits flush with the floor. Secure the flange with screws or bolts, making sure it is firmly in place. If the new flange requires adhesive or sealant, follow the manufacturer’s instructions for application.
Step 4: Attach the Wax Ring
Place a new wax ring onto the flange, ensuring it is centered and aligned. The wax ring creates a watertight seal between the toilet and the flange, preventing leaks.
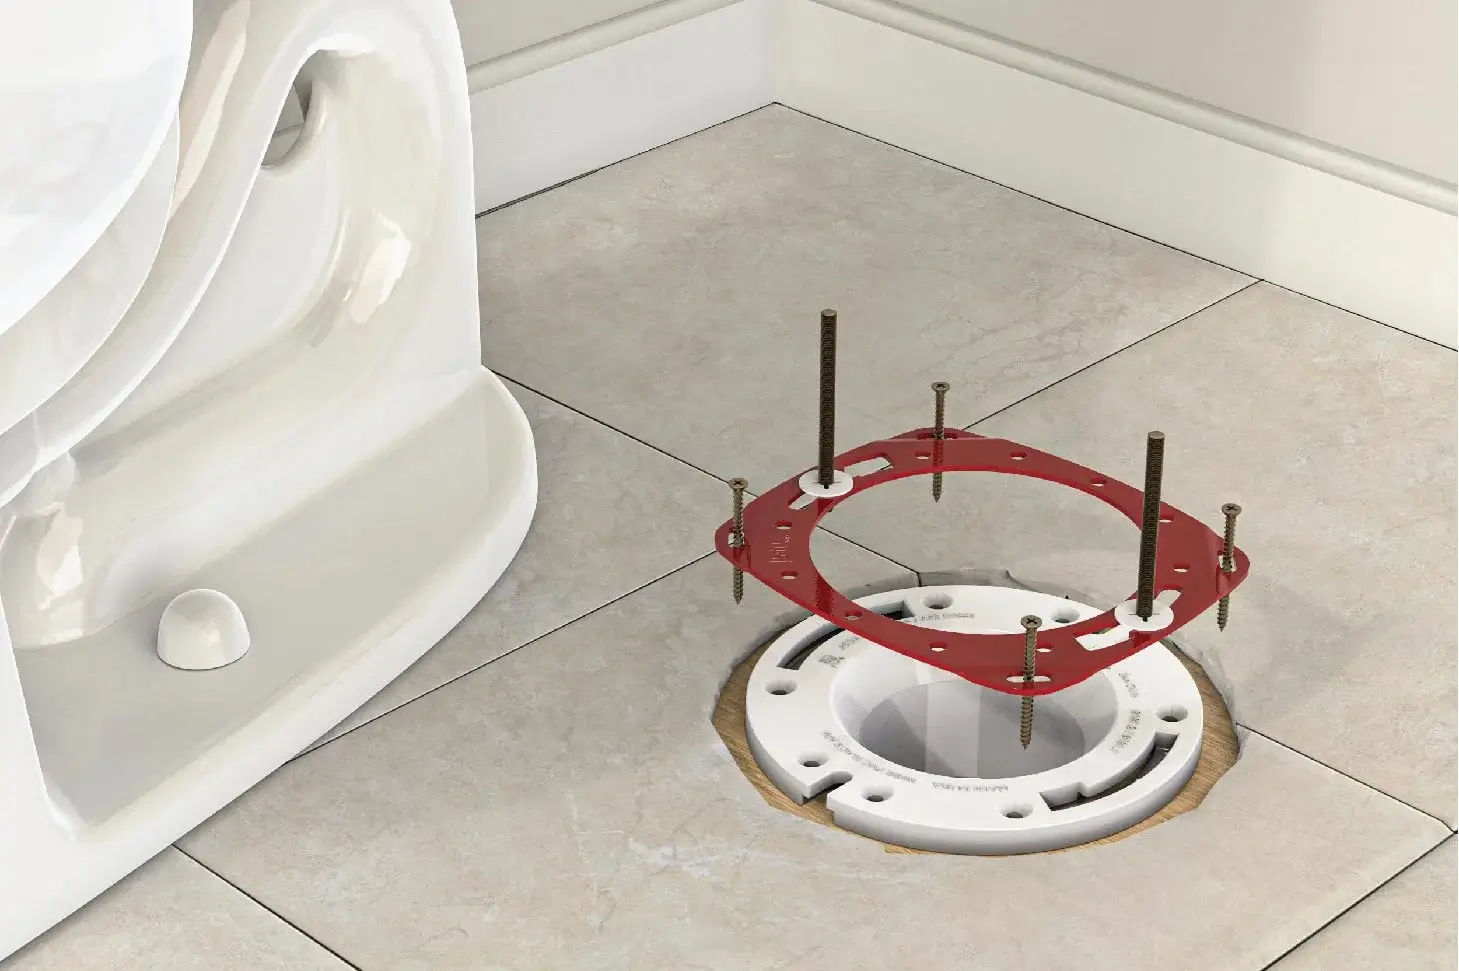
Step 5: Reinstall the Toilet
Carefully lift the toilet and align it with the flange and wax ring. Lower the toilet onto the flange, applying even pressure to compress the wax ring and create a secure seal. Reattach the bolts to secure the toilet to the floor, being careful not to overtighten and crack the porcelain.
Step 6: Reconnect the Water Supply
Reattach the water supply line to the toilet and turn on the water supply. Flush the toilet several times to ensure there are no leaks and the toilet is stable.
Troubleshooting Common Issues
Uneven Toilet Base
If the toilet wobbles after installation, the flange may not be level. Use shims to level the toilet and tighten the bolts evenly to stabilize it.
Persistent Leaks
If water continues to pool around the base of the toilet, the wax ring may not have created a proper seal. Remove the toilet and replace the wax ring, ensuring it is correctly positioned.
Maintaining Your Toilet Flange
Regular Inspections
Regularly inspect the toilet flange for signs of wear or damage. Early detection of issues can prevent costly repairs and maintain the integrity of your plumbing system.
Proper Cleaning
Keep the area around the toilet base clean and dry. Moisture can weaken the flange and lead to deterioration over time.
Also Visit: The Complete Process of Replacing a Toilet Flange
Conclusion
Replacing a toilet flange is a manageable task that can save time and money. By understanding the steps involved and taking necessary precautions, you can successfully replace a toilet flange and maintain a properly functioning bathroom. For additional plumbing tips, including how to unclog a toilet comparison of the best methods and equipment, consult reliable resources or professional plumbers.
In summary, knowing how to replace a toilet flange is an invaluable skill for maintaining a functional and leak-free bathroom. Follow the outlined steps, use the proper tools, and take your time to ensure a successful installation.