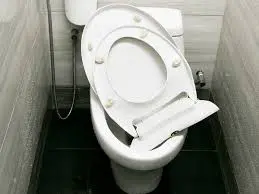
Toilet seat repair is a common household task that can often be accomplished with minimal tools and effort. Whether your toilet seat is loose or broken, these quick fixes will help restore its functionality and appearance. This guide covers various solutions and tips for repairing different types of toilet seats, ensuring a comfortable and secure bathroom experience.
Identifying the Problem

Loose Toilet Seat
A loose toilet seat is usually caused by worn-out or loose bolts. This problem is not only uncomfortable but can also lead to further damage if left unaddressed.
Causes of a Loose Toilet Seat
- Worn-out Bolts: Over time, the bolts that secure the toilet seat can wear out or loosen.
- Incorrect Installation: Improper installation can also cause the seat to become loose.
Tools Needed
- Adjustable wrench
- Screwdriver
- Replacement bolts (if necessary)
Broken Toilet Seat
A broken toilet seat can result from heavy impact, wear and tear, or defective materials. This issue requires immediate attention to maintain hygiene and safety.
Types of Damage
- Cracks and Breaks: Visible cracks or breaks in the seat material.
- Broken Hinges: Damaged or malfunctioning hinges that prevent the seat from staying in place.
Quick Fixes for Loose Toilet Seats

Tightening the Bolts
The simplest solution for a loose toilet seat is to tighten the bolts.
Steps to Tighten the Bolts
- Locate the Bolts: Find the bolts that secure the toilet seat to the bowl. These are usually located at the back of the seat.
- Tighten with a Screwdriver: Use a screwdriver to tighten the bolts. Turn them clockwise until they are snug.
- Use an Adjustable Wrench: If the bolts are particularly loose, use an adjustable wrench to hold the nuts underneath while tightening the bolts from above.
Replacing Worn-out Bolts
If tightening the bolts doesn’t fix the issue, they may need to be replaced.
Steps to Replace the Bolts
- Remove the Old Bolts: Use a screwdriver and wrench to remove the old bolts and nuts.
- Insert New Bolts: Place new bolts into the holes, ensuring they are properly aligned.
- Tighten the New Bolts: Secure the new bolts with a screwdriver and wrench, tightening them until the seat is stable.
Quick Fixes for Broken Toilet Seats
Repairing Cracks and Breaks
Small cracks can be repaired using adhesive or epoxy, while larger breaks may require a complete replacement.
Steps to Repair Cracks
- Clean the Area: Thoroughly clean the cracked area with soap and water. Dry it completely.
- Apply Adhesive: Apply a strong adhesive or epoxy to the crack. Press the sides together and hold until the adhesive sets.
- Allow to Dry: Let the adhesive dry completely before using the seat.
Replacing a Broken Seat
In cases of severe damage, replacing the seat may be the best option.
Steps to Replace the Seat
- Remove the Old Seat: Unscrew the bolts and remove the broken seat.
- Select a New Seat: Choose a new seat that matches the shape and size of your toilet. For instance, a Corona toilet or a Toto wall mount toilet may have specific seat requirements.
- Install the New Seat: Align the new seat with the holes and secure it with the provided bolts and nuts. Tighten them until the seat is stable.
Advanced Fixes for Toilet Seat Issues

Adjusting the Flapper
An adjustable toilet flapper can improve the efficiency of your toilet, especially if the seat is not closing properly.
Steps to Adjust the Flapper
- Turn Off the Water Supply: Shut off the water supply to the toilet.
- Adjust the Flapper Chain: Adjust the chain length to ensure the flapper closes properly after flushing.
- Test the Flapper: Turn the water supply back on and test the flapper to ensure it works correctly.
Replacing the Toilet Flange in Concrete Floor
A damaged toilet flange can cause the toilet seat to wobble. Replacing it requires more advanced skills.
Steps to Replace the Flange
- Remove the Toilet: Turn off the water supply and remove the toilet.
- Remove the Old Flange: Use a chisel and hammer to remove the old flange from the concrete floor.
- Install the New Flange: Secure the new flange into the concrete floor and reattach the toilet.
Using a Toilet Floor Spacer
A toilet floor spacer can be used to level the toilet and prevent the seat from becoming loose.
Also Visit: The Complete Process of Replacing a Toilet Flange
Steps to Install a Toilet Floor Spacer
- Lift the Toilet: Carefully lift the toilet and place the spacer on the floor.
- Align the Toilet: Align the toilet with the spacer and secure it with bolts.
- Tighten the Bolts: Ensure the toilet is stable and the seat is properly aligned.
Additional Tips for Maintaining Your Toilet Seat
Regular Inspection
Regularly inspect the toilet seat and its components to identify and address any issues promptly.
Proper Cleaning
Clean the toilet seat and hinges regularly to prevent buildup of dirt and grime, which can cause wear and tear.
Choosing the Right Seat
Select a durable and high-quality seat, such as those designed for Corona toilets or Toto wall mount toilets, to ensure longevity and comfort.
Conclusion
Toilet seat repair is a straightforward task that can be accomplished with basic tools and a bit of know-how. By following the quick fixes outlined in this guide, you can easily address common issues such as loose or broken toilet seats. Regular maintenance and prompt repairs will ensure your toilet seat remains functional and comfortable for years to come.
