
How to disassemble a shower cabin without resorting to the help of specialists? You are moving to a new place and want to take your plumbing equipment with you. Or maybe you purchased a more modern model of hydrocapsule, but want to dismantle the old one at minimal cost to transport it to your dacha or sell it on Avito?
Step-By-Step Instructions For Dismantling Shower Cabin
Disassembly of the structure is also necessary for partial repairs of plumbing and updating the tightness of parts. In all cases, carefully study the instructions for disassembling the old shower stall.
Preparatory stage
Dismantling a shower cabin is a little easier than installing it. But even here you cannot do without a set of tools. Prepare:
- Screwdriver Set;
- carpenter’s knife;
- adjustable wrench;
- screwdriver;
- means for cleaning surfaces with sealant;
- hammer drill (if the cabin pan is walled up in a cement screed).
Clean all joints and connections of silicone. It is recommended to use a special product. Preference is given to compositions that do not contain alkali or acid. You can purchase it at all building and finishing materials stores. Please read the instructions before use. The method of application is approximately the same:
- Apply the compound to the seam. To reduce evaporation, cover this area with film.
- Remove any swollen silicone.
- Wipe off any remaining residue with a remover and a dry cloth.
The solvent hardens quickly, so apply it to a small area and quickly remove the silicone.
removing old sealant using a special product
You can clean it with solvent, gasoline, or acetone. But such treatment, when disassembling the shower stall yourself, often harms the surface. If the structure will be assembled and used in the future, do not neglect this recommendation.
It is practised to remove the seal using a thin, sharp knife. Carefully pry up the frozen silicone strips and slowly remove them with your fingers. Don’t rush, don’t force yourself. You can scratch the surface, which will cause chips. This will affect the further tightness of the hydraulic cabin and its appearance.
Removing the seal using a knife or spatula
Step-by-step instructions for self-analysis
If some functions of the shower structure are powered from the mains, first turn off the machine on the power supply panel to the cabin. Plugs are placed on sockets and connectors.
- Turn off the water supply using the shut-off valve.
- Using an adjustable wrench, disconnect the flexible hoses.
- Disconnect the pipe from the drain system.
- We free the inner surface from mirrors, shelves, and seats.
- We remove all additional accessories.
You can begin dismantling the old shower stall. For greater convenience, you can use the assembly instructions included with your product. The parsing process is carried out in reverse order. The instructions describe in detail all the fastening parts, where they are located, and how they can be detached. This will help in the process of disassembling the shower cabin with your own hands.
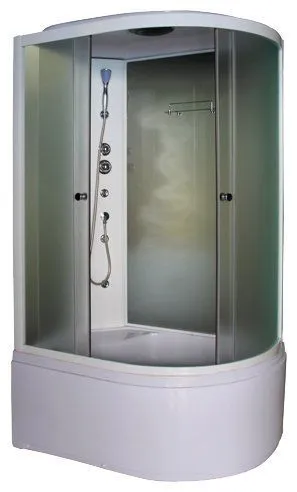
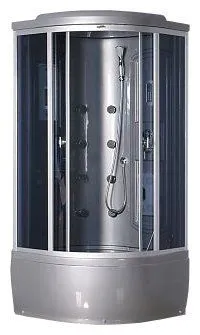
Removing the cabin with a high tray
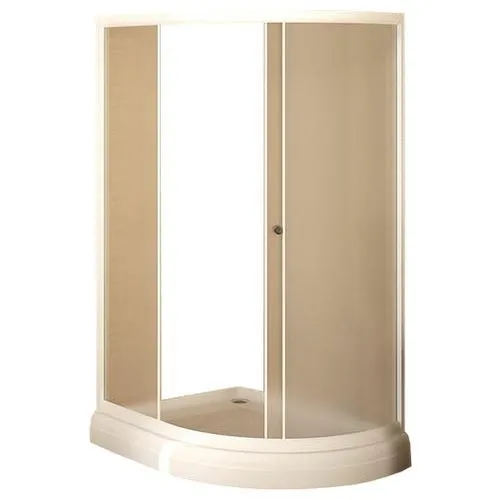
Removing the doors
The door operating mechanism is approximately the same: rollers move along guides at the top and bottom. Stoppers installed in the grooves prevent the door from moving beyond the movement limits. Glass doors have considerable weight, so it is advisable to work with an assistant.
- Loosen the screw on the top rollers. There is no need to unscrew it completely; this element fixes the rollers in the guides.
- Unscrew the screw and remove the rollers from the lower guides. The door hangs on the top fastenings.
- Lift the door and remove it from the top profile.
- Removal is carried out towards the middle of the shower stall.
- Make sure that the edges do not catch on adjacent parts. Tempered glass is quite fragile; if handled carelessly, chips and cracks may occur.
Loosen and remove the rollers
The door has been removed. Place it horizontally in another room.
Dismantling walls, partitions, frames
When installing a shower cabin instead of a bathtub, the partitions are attached to the frame of the side profile and secured with fasteners. During disassembly, access to the rear walls is difficult, so these fasteners are removed first. Unscrew the screws from the centre pillar. Carefully press on the upper edge of the wall, inside the cabin. She should log out of her profile. We pull it out of the lower grooves by lifting it up.
In closed types of structures, the next step is to remove the roof. The shower head is removed and the hose leading to it is unscrewed. The backlight and speakers located on the cover are pulled out of the holes. The roof is removed from the grooves.
Dismantling walls, partitions, frames
When disassembling a corner shower stall, pay attention to the fastenings to the wall. We unscrew the screws from the dowels. We disassemble the frame on the floor. We unscrew the connections between the vertical posts and the semicircular guides. If the arches are attached to the central pillar with an open fastening, first remove them. Then we unscrew the guides from the wall.
Shower cabin disassembled
Pallet dismantling work
This is perhaps the most difficult part of dismantling. Methods for disassembling a shower tray depend on the installation and type of structure. If the old cabin was installed on a metal frame and it is planned to install a new structure of the same dimensions, the pedestal can be left. How to disassemble a shower cabin with a high tray:
- remove silicone;
- dismantle the decorative apron;
- unfasten the container;
- disconnect the bowl from the steel frame;
- turn on its side;
- remove the siphon;
- remove the pipe from the sewer system.
Removing a medium-depth tray
The method of disassembling a shower cabin with a low tray depends on the mounting methods. With shallow sides, it is difficult to install drainage equipment, so such structures are often installed on elevated surfaces or mounted directly into the floor.
- If the bowl is mounted on its own frame: dismantling is standard.
- The container is embedded in the walls: use a crowbar or pry bar to move the tray away from the wall.
- The base of the cabin is embedded in a recess in the floor: you have to open the floor covering and release the pallet using a jackhammer.
Dismantling the low pallet
Instructions for disassembling the drain device
If the sewer system is not old, the siphon from the shower stall is carefully disassembled, washed, dried, and again used for its intended purpose. Step-by-step disassembly of the siphon under the bathtub:
- disconnect the elbow from the drain pipe.
- Unscrew the siphon from the pan.
- We disassemble the upper part located in the container: remove the grille, and the plug, and take out the sealing gaskets.
Siphon disassembled
These are the basic steps on how to disassemble a shower drain. When the corrugated pipe is disconnected from the sewer, an unpleasant odour may come from the system. For protection, simply quickly plug the hole with a rag or seal it with tape.
Removing the shower and faucet
An important role when disassembling a shower stall is played by the instructions “How to disassemble a shower and faucet in a bathroom.” Parts with a rigid connection are usually installed in hydrocapsules. When disassembling a bathroom faucet with a shower, before unscrewing the taps, place a cup or basin under them to collect water. Remaining moisture collects in the system, it will leak out and create additional dirt. Recommendations on how to disassemble a faucet in a shower stall:
- Disconnect the flexible hose using an adjustable wrench.
- Unscrew the connection to the pipeline.
- Remove the decorative plug on the handle.
- Using a hexagon, remove the bolt.
- There is a screw in the hole formed. Unscrew it and remove the handle.
- Remove the decorative trim and remove the clamp.
- After unscrewing the nut located on the rear panel of the cabin, remove the mixer along with the rubber seal.
Mixer disassembled
The shower head can later be used in an old cabin or in a summer shower in the country. Let’s look at how to disassemble a shower in a bathroom without damaging the components. The shower head is attached to the threaded connection using a nut. In modern models, fastening elements are hidden under a decorative cover. It can be removed using a knife or flat screwdriver.
Cab overhead watering can
- Loosen the mounting screws.
- We remove all the components one by one.
- The holes in the shower may be clogged with lime or water impurities; we clean them with a hairpin or a knitting needle.
- We collect the washed and dried parts back into the product.
If the shower head is heavily clogged with lime, you can use special cleaning products. After this, wash with ordinary soapy water.
When disassembling the back panel, turn it wrong side out and disconnect all the corrugated pipes. Remove the hydromassage jets.
The inside of the central panel
In conclusion – tips and recommendations
- Before starting disassembly, drain all the water from the shower system and wipe the entire structure with a dry cloth.
- If the installation of the drain system is done using an adjustable tee, disconnection will be more difficult. It is supposed to unscrew several clamps and threaded connections.
- The deep tray is always installed on a high frame with legs. If necessary, the structure can be easily moved.
- Shower doors can only be removed from inside the cabin. This way the grooves and rollers will not be damaged.
- When disassembling the side panels, the panels should be held while the screws are removed. It is advisable to have an assistant.
- Removing the panels can be difficult due to dried old sealants. They need to be carefully cut with a sharp knife.
- If you are planning a secondary self-assembly of the same cabin, record the disassembly process on video. Take photos of complex assemblies. This will help you during installation.